Tuesday, July 31, 2012

Apple Pecan Granola (Gluten-Free)

In the last couple of years, several of my cousins have decided to adopt a gluten-free diet.  One has Celiac’s Disease, the others a sensitivity to gluten.  All three have had great health benefits from removing gluten from their meals and are thrilled with the results from living gluten-free save for one fact:  eating gluten-free can be pricey.

Gluten-free products often use a combination of different alternative flours to replace traditional all-purpose flour, which is high in gluten.  Since replacing wheat in many traditional recipes is an art, it is understandable that they might be more expensive.  But here’s a way to avoid the high price tags of gluten-free cereal: make our own at home!

This granola is not only gluten-free, it is very high in protein, stemming from its use of quinoa (along with soy, the only plant-based whole, complete protein), pecans and flax.  And don’t forget this awesome tip for baking granola in the oven! 

Apple Pecan Granola (Gluten Free)

2 1/2 cup gluten-free whole oats (oats are gluten-free, but most commercially produced oats are ground on equipment shared with wheat and have residual gluten)
1/2 cup ground flax seeds or flax meal
1/4 cup uncooked quinoa
1/2 cup pecans
3 tablespoons vegetable oil
1/4 cup honey
1 tablespoon maple syrup (or just use more honey)
1 teaspoon vanilla extract
dash of salt
1 cup dried apples, diced*

Preheat oven to 300 degrees.

In a large stainless steel bowl, combine the oats, flax, quinoa, pecans, oil, honey, maple syrup, vanilla and salt.  Stir well.

Place bowl in oven and bake for 30 minutes.  Remove from oven and stir.

Bake an additional 30 minutes, stir, and repeat one more time for a total cooking time of 90 minutes or until the granola is golden.

Add the diced apple, stir well.  Let cool.


Store in a bag for up to one week.

Makes about 4 3/4 cups granola.

Life is sweet,
SPC

*for the dried apples, we used these:

Friday, July 27, 2012

Basil and Feta Corn on the Cob

One of my favorite foods of summer is fresh, sweet corn on the cob.

But it's about this time of the year that corn on the cob gets a little, well, to use a term my mother uses, "pedestrian."  Here's a great way to jazz up your corn on the cob without much effort at all!


This recipe is a twist on pesto, but when I created it I happened to have feta and used it instead.  I also opted to use olive oil instead of butter...because it is still swimsuit season!

Basil and Feta Corn on the Cob

1 cup fresh basil leaves
2 tablespoons extra-virgin olive oil
2-3 tablespoons water
1-2 tablespoons rice or apple cider vinegar
2 tablespoons feta cheese
1 clove garlic, chopped
1/4 teaspoon salt
1/4 teaspoon pepper
8 ears of corn on the cob

Bring a large stock pot of water to a boil.  Husk and clean the corn.  Boil the corn for approximately 10 minutes.  Remove from the water.

Meanwhile, place all ingredients in a food processor, using the lower amounts of water and vinegar.  Process until the basil is chopped fine. 

Scape the sides of the food processor and process again.  Taste and add more water or vinegar to taste.

Process until smooth.

Drizzle approximately 1 tablespoon per corn cob.

Makes 8 whole ears of corn, or 16 half-ears.


Life is sweet,
SPC

Tuesday, July 24, 2012

Classic Summer Berry Crisp


I am not sure how things are in your neck of the woods, but here in Ohio, berries are in abundance.

Two years ago my mom gave me a great tip: buy (or pick!) berries in bulk and freeze them in containers. The berries freeze quickly and keep well. To thaw the berries, simply run them under warm water. The washing accomplishes to things: it cleans the berries before use and it quickly thaws them.

Since frozen berries aren't as firm as fresh berries, they are perfect for use in a crisp or cobbler. This recipe is healthy and easy, and can use any combination of berries that you choose.

Classic Summer Berry Crisp


6 cups berries
3 tablespoons sugar
1 tablespoon corn starch
1-2 tablespoons lemon or lime juice
2/3 cup whole oats
1/2 cup flour (you can use whole wheat)
1/2 cup sugar
1 teaspoon cinnamon
1/3 cup butter or Earth Balance, cut into small pieces
1/4 teaspoon salt

Combine the berries, sugar, corn starch and juice:


In a separate bowl, combine the remaining ingredients and mix with the back of a fork or pastry blender until the butter is well incorporated into the oat mixture:


Preheat the oven to 350 degrees.

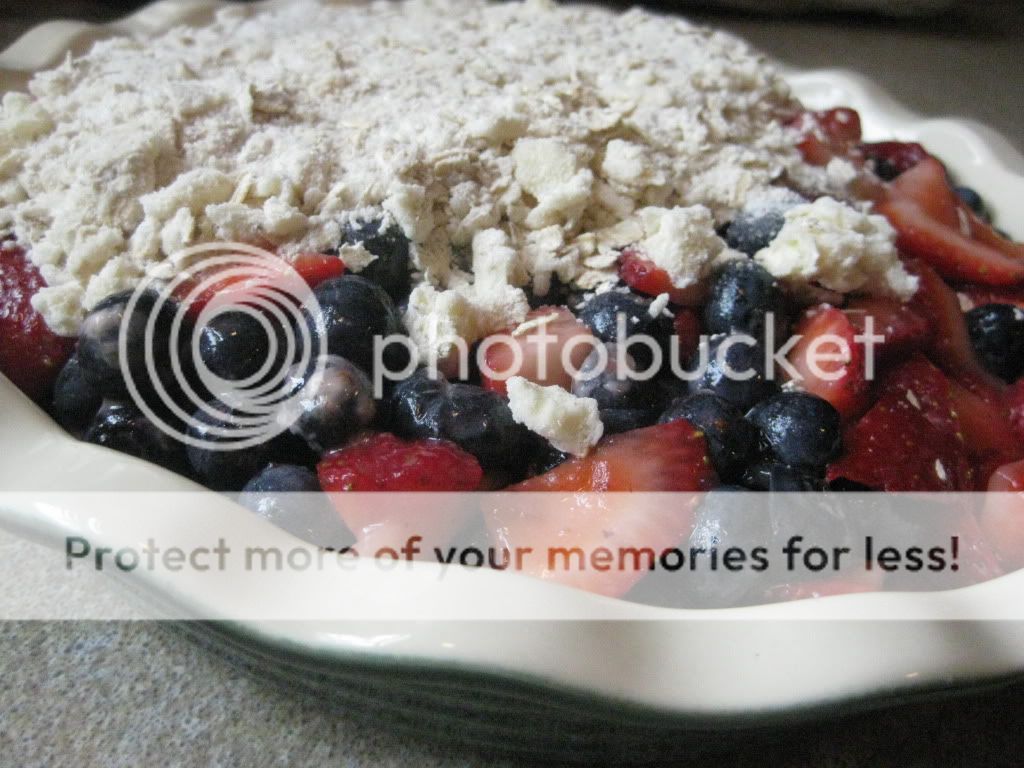
Pour the berries into a deep dish pie pan or 9x9 glass dish, topping with the oat mixture:


Bake for 35-40 minutes. Remove from the oven when the berries are bubbly:


Can be served warm or at room temperature.

Serves 8.

Psst...this tastes even better with a scoop of ice cream on top.

Life is sweet,
SPC

Wednesday, July 18, 2012

Happy Brownies and Sundae Toppings


Okay, raise your hand if you're a brownie or bar cookie lover.  Me too.  But really raise your hand if you try and go out of your way to avoid edge pieces.  (See my hand waving enthusiastically in the air?)

I admit it:  if I am at an event with brownies, I slowly scope out the plate before choosing one without an edge.  Edges are hard and can be dry and crumbly, while the inner pieces are chewy-ooey good.

Here's a simple tip for a plate full of edge-less brownies.  First, cut them like so:


Remove the edge pieces, cutting each rectangle in half to make mini-squares.  Freeze the squares, keep the brownies to serve with pride:


After you are done enjoying your brownies, use the brownie edge mini-squares as a perfect topping for a sundae or ice cream treat.  The edge pieces hold up well to the ice cream, and are a fun extra for your little sweet pea:


See that?  Your bowl of ice cream just went from "thanks mom!" to "Wow, thanks mom, can I fold the laundry for you?"*

Life is sweet,
SPC

*Results not guaranteed.  But one can dream, right?

Monday, July 16, 2012

Make-It-Your-Own Asian Noodle and Vegetable Salad

G's taking evening swim lessons at a local outdoor pool.  I love going to the swimming pool in the early evening, once the crowds have left and the loudest noise you hear is the splash from folks jumping off the diving boards.

I made this recipe to take with us to the pool so we could swim, eat dinner, swim some more.  The whole family loved it, and I especially loved the sweet and savory Asian dressing.  I used the extra dressing on an extra salad or two throughout the week.

We made this recipe with seared tofu, but the original recipe, from this month's Eating Well magazine, used chicken.  Feel free to make this your own recipe, by using your favorite protein and mixing up the vegetables too!

Try this, it is a great make-ahead dinner or lunch, or even a side dish for a potluck!

Make-It-Your-Own Asian Noodle and Vegetable Salad

4 ounces Chinese Egg Noodles, or other thin pasta
1/2 cup peanut or almond butter
1/3 cup rice vinegar
1 tablespoon seasoned rice wine or dry sherry
1 tablespoon reduced-sodium soy sauce
1 teaspoon Asian chile sauce
6 cups chopped salad greens
1 red or yellow bell pepper, chopped
1 small cucumber, seeds removed, chopped
1 cup broccoli, cut into small florets
1/2 cup sliced red onion
1/4 cup roughly chopped cilantro
1 pound cooked chicken, tofu, pork or shrimp

Cook the noodles according to package instructions, drain and cool.  Set aside.

While the noodles cook, combine the peanut or almond butter, rice vinegar, rice wine, soy sauce and chile sauce in a lidded container.  Shake well to combine.  Set aside.

In a large bowl, combine the salad greens, bell pepper, cucumber, broccoli, red onion, cilantro and cooked protein.  Toss well.

Add the noodles and about 3/4 sauce to the salad mixture and toss well.  Taste.  You may want to add the extra dressing, if desired.


Serves 4 for dinner, 6 as a side dish.

Life is sweet,
SPC

Thursday, July 12, 2012

Fresh Lemon and Herb Tuna Salad


I love a good chicken, tuna or egg salad sandwich, but the calories of the usual mayo-laden mixture?  Not so much.  Plus, who wants to have a heavy mayo dish in their belly on a hot summer day? 

This recipe for tuna salad removes the calorie-laden mayonnaise and replaces it with a fresh herb, lemon juice, olive oil and vinegar light dressing.  The result?  Less calories and fat than traditional tuna salad, with way fresher flavor! 

Fresh Lemon and Herb Tuna Salad

2 - 5oz containers canned tuna in water, drained
2 tablespoons red onion, diced (or chives or green onion)
3-4 tablespoons fresh herbs (I used parsley and basil)
1 tablespoon fresh lemon juice
1 tablespoon rice vinegar
1 tablespoon extra virgin olive oil
1/2 teaspoon kosher salt
1/4 teaspoon fresh ground pepper
salad greens (optional)
bread (optional)

Combine all ingredients in a medium bowl.  Stir well.


For best flavor, refrigerate for an hour or so before serving, but can definitely be eaten immediately!

Serve with salad greens or bread.


Serves 4.

Life is sweet!
SPC

Monday, July 9, 2012

Removing Refrigerator and Freezer Smells

One of the less-than-pleasant tasks of last week's storm and power outage aftermath was de-stinking our refrigerator and freezer.  Man, oh man, they stunk!  Think rotten scallops and an exploded, curdled milk container, and you're on your way to imagining the funk that stunk in our kitchen.

First, SPH and I removed all the spoiled food.  I tried not to get too upset over all the lost food, but it was hard to throw so much out, especially the frozen prepared meals.  Sigh.  "At least no one was hurt and our roof is still intact," was my line.

Next, SPH took out every single shelf and drawer from both the fridge and freezer and placed them outside for an old fashioned scrub down.  We used an all-purpose non-toxic cleaner since the shelves would be holding food, and then let them air out outside for a day or so.

Then, I scrubbed all the little nooks and crannies of the fridge and scrubbed some more.

Once all the mess was clean, it was time to get rid of the smells!  Here are four easy ways to get rid of the funk:

1.  Fresh Herbs/Essential Oils and Baking Soda:  Simply cut fresh herbs (we have rosemary and mint in abundance, so that is what I used) and sprinkle with baking soda, which will absorb foul smells.  Alternatively, mix a few drops of an essential oil such as lavender, peppermint or lemon with the baking soda.  Place in your fridge and close the door.


2.  Coffee and Oatmeal:  The coffee will overwhelm and absorb the foul smells, the oatmeal will help absorb foul smells and help leach our extra moisture.


3.  Newspaper:  Not sure why, but newspaper helped absorb the odor too.  Someone recommended this to me and it seemed to work!


4.  Fresh Air:  Sure, you probably can't carry your fridge and freezer outside, but if you are able, prop open the doors and let fresh air do the trick.  This method works best on minor funks, if you have a super stinky fridge, you probably don't want to try this one.  Be sure to turn the fridge off if you still have power and want to try this technique, as you don't want to waste energy.

After only a day and a half, our fridge and freezer smelled like new again.  Thankfully, the rank smells of last week are a distant memory!

Life is sweet,
SPC

Saturday, July 7, 2012

In the last 9 days...

My life in the last 9 days:

--pack for a family reunion in North Carolina
--write and schedule the July 2 post for SP&P
--leave for the family reunion
--witness a tornado on the way to North Carolina
--cower in a Pizza Hut bathroom waiting for the storm to pass
--receive a phone call from a neighbor saying we have major tree limbs down in our yard
--gasp when I receive pictures of tree damage
--arrive to North Carolina, trying to take deep breaths to recover from events of the trip
--enjoy a nice visit in the mountains of North Carolina
--return home from North Carolina to discover my family and friends have cleaned up our storm damage
--sniff some foul smells coming our rotten food
--discover my inner Pioneer as I live life without power
--hunker down in our basement, trying to sleep in the coolness, since the temperatures here have been hovering around 100 degrees.
--swell with gratitude from all the generous offers of help from neighbors and family
--celebrate the 4th of July
--rejoice greatly when our power returns on the 5th of July
--resist feeling grumpy about our phone, internet and cable not returning
--pray for those who still do not have power from the storm, now 8 days ago
--smile when I win "Runner Up" in the Market District Burger Contest earlier today for this recipe.
--park myself at the local library to do some writing.

Phew.

Back soon with some yummy recipes and stories, but for now, I am recovering from an eventful 9 days.

Life is sweet,
SPC

Monday, July 2, 2012

Coconut Pops (with a Patriotic Touch)

Over the last month I have been hankerin' for coconut pops.  I have enjoyed a good amount of these:


Could I make my own homemade version?  This recipe comes pretty darn close!

Homemade Creamy Coconut Pops

1 - 15 oz can light coconut milk
2 tablespoons agave nectar (or use 1 tablespoon additional white sugar)
2 tablespoons white sugar
1/4 teaspoon vanilla extract
Optional Patriotic Touch:  little blueberries and strawberry bits.

In a large bowl, combine the coconut milk, agave, sugar and vanilla extract.  Stir well until the sugar is dissolved.

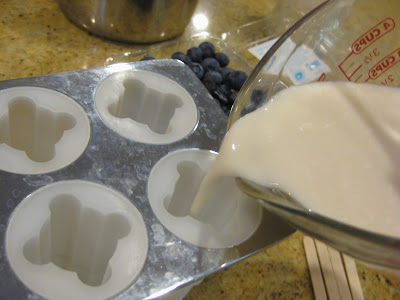
Pour into popsicle molds, or little dixie cups:


If you wish, gather some small blueberries and slice off the sides of some strawberries and dice.


Drop some fruit in the popsicle molds:


Pop in some sticks, freeze and enjoy!

This popsicle had three blueberries and four pieces of strawberry.  You can add more for more color.
Have a wonderful 4th of July!

Life is sweet,
SPC